Important Note: CherryPie is no longer supported.
PassKit released the all new PassKit Platform in early 2020. This platform incorporates decades of experience designing, developing and implementing world class mobile wallet solutions for some of the biggest international brands. And at the same time, working with small businesses all over the world to help them access the cool capabilities of Apple Wallet and Google Pay passes. We have combined these rich learnings, proven best practices and ever growing knowledge, to deliver you the very best mobile wallet management platform. A platform where you can extend your mobile reach by quickly integrating Apple Wallet and Google Pay Passes into your business. Into your processes. Into your systems. And most importantly into your customer experience.
PassKit now delivers dedicated modules to solve your specific business use cases. No longer do you need to waste time learning about ‘passes’ language. No longer do you need to study mobile wallet terminology. You now work with Mobile Wallet API’s designed around your business processes; your language. A language you are already familiar with. The latest platform currently covers:
TRY THE NEW PASSKIT PLATFORM FOR FREE – UNLIMITED TEST PASSES
————–
CherryPie is a simple yet powerful mobile marketing automation platform, meticulously designed and crafted for marketers and agencies. CherryPie enables businesses to propel customer engagement, drive physical world transactions/revenue, and stimulate sustainable loyalty by leveraging native mobile wallet applications and beacon technology.
CherryPie is now upon us, meaning that marketers now have access to an entirely new form of mobile marketing automation. Each week, I’ll walk you through a tutorial on how to get the most out of your experience with CherryPie. This week, I’ll cover push notifications within CherryPie.
Push Notifications
Push notifications allow you a direct line to your consumers. A good push notification gives the customer value and helps build a relationship between your business and your customers. And with CherryPie, sending push notifications to your customers has never been easier.
Example 1: Sending Updates/News/Promotions
You’ll need to have already created an offer and activated your campaign. You can check out this blog post for more information on how to do that.
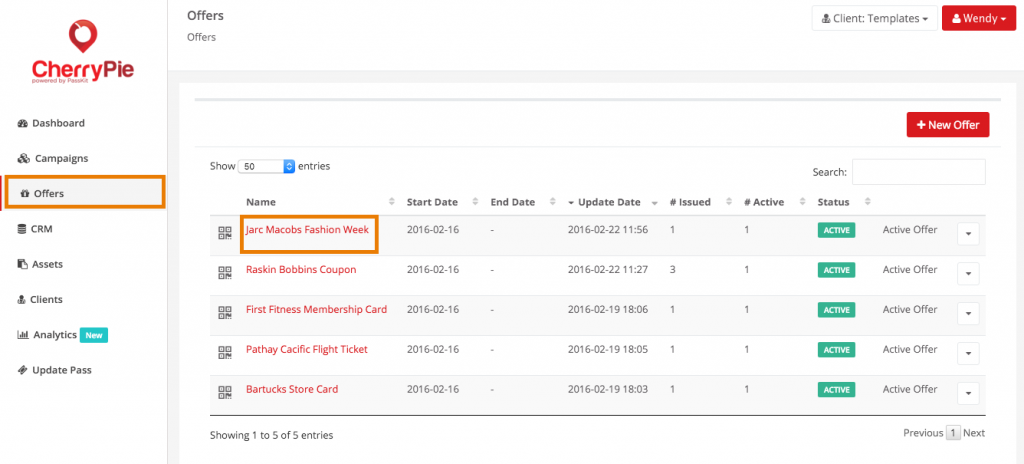
1. Click on ‘Offers’ and select an offer that you have already created.
2. Click on ‘Design’ and click on ‘Back’ to flip to the back of the pass.

3. Add another field on the back of the pass by clicking on the green plus icon and type in Updates in the ‘Label’ field.
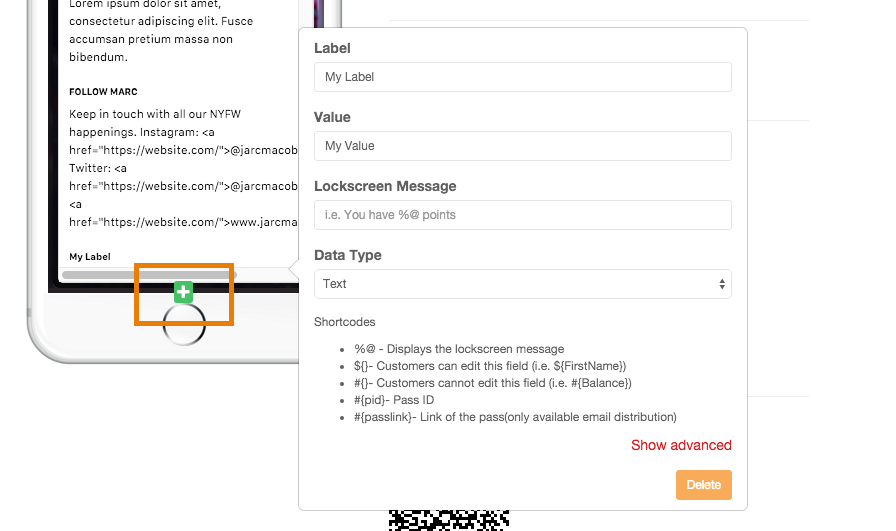
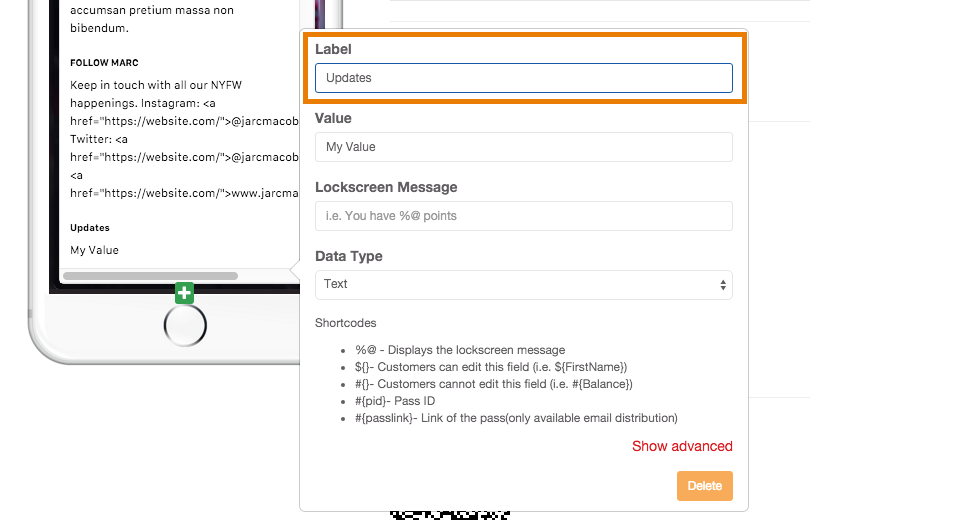
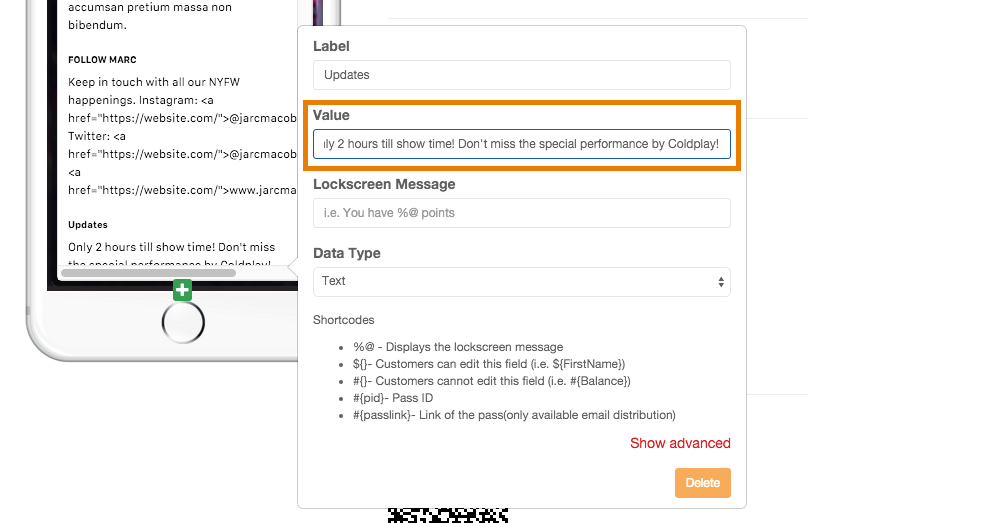
4. Enter in a message in the ‘Value’ field that is relevant to the offer/campaign.
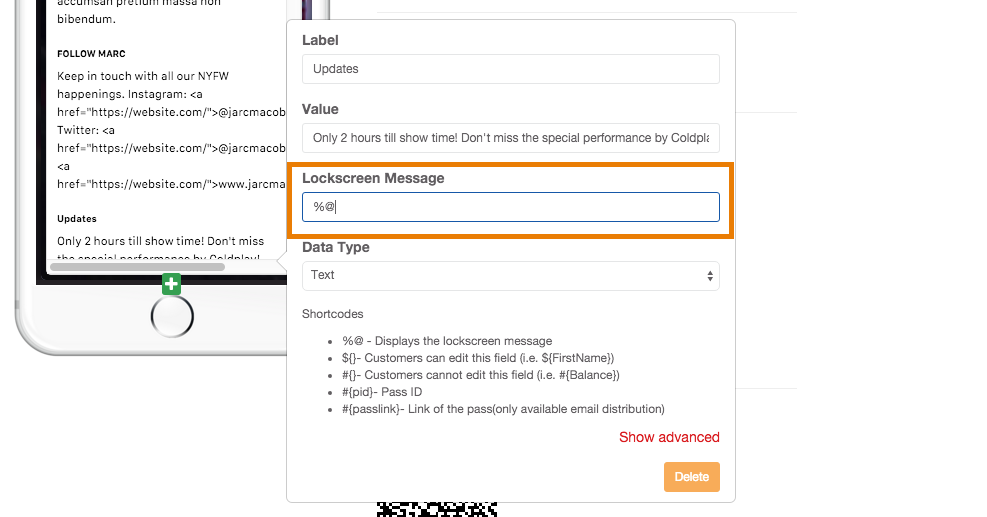
5. Type %@ in the ‘Lockscreen Message’ field. The ‘%@’ is a shortcode which is used to show a new message on the lock screen.
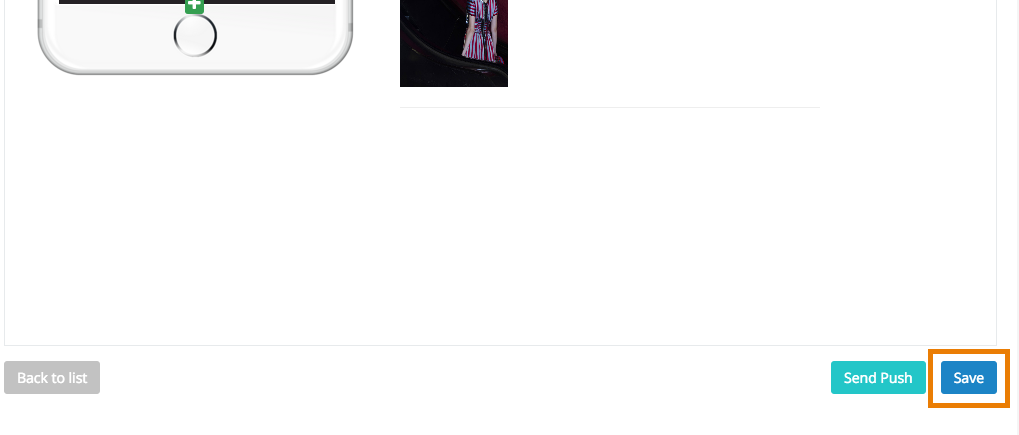
6. Save your offer. If you already have the pass in your phone, simply flip to the back of the pass and pull down to refresh with the latest update.
7. Go back to CherryPie and change the ‘Value’ field to a different message.

8. Click ‘Save’ and once it’s saved, click on ‘Send Push’. This will send a push update to all devices with the updated message.

9. Here’s what users will see on their lockscreen.

Example 2: Showing Changes in Value
What if you want to show users a lock screen update when a value on their pass changes? For example – an increase in loyalty points, stored value card balance deduction, the time of an event changes, or a customers’ seat number changes.
It’s simple – and you’ll use the exact same shortcode ‘%@’.
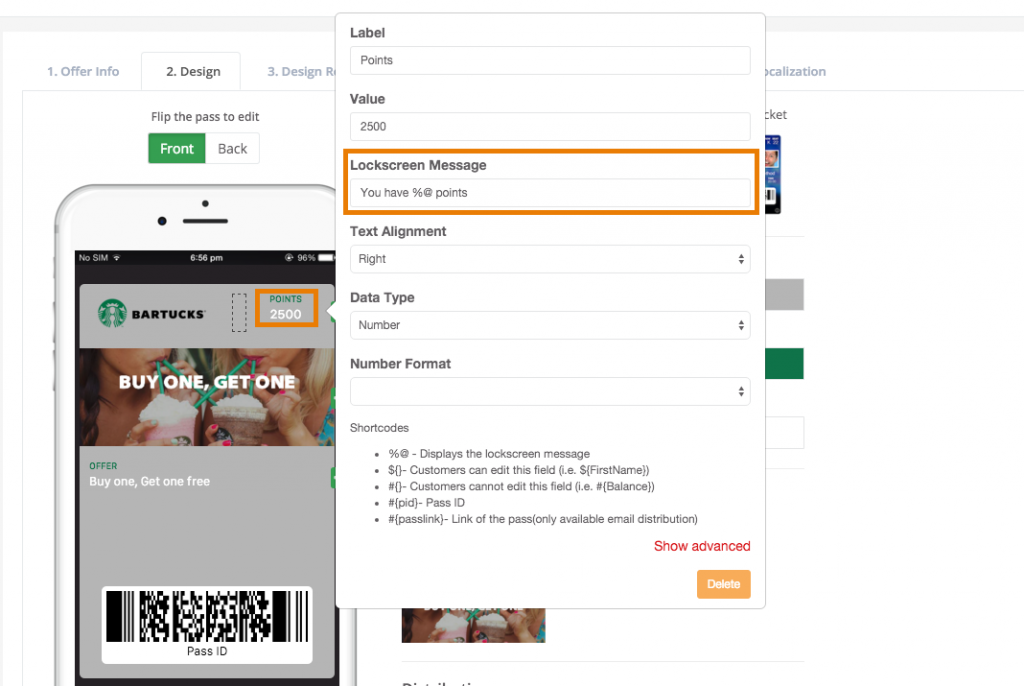
Points Update
In the ‘Lockscreen Message’ field, simply enter ‘You have %@ points’. The %@ is the new updated value and the text around it adds more context to the user seeing the message.
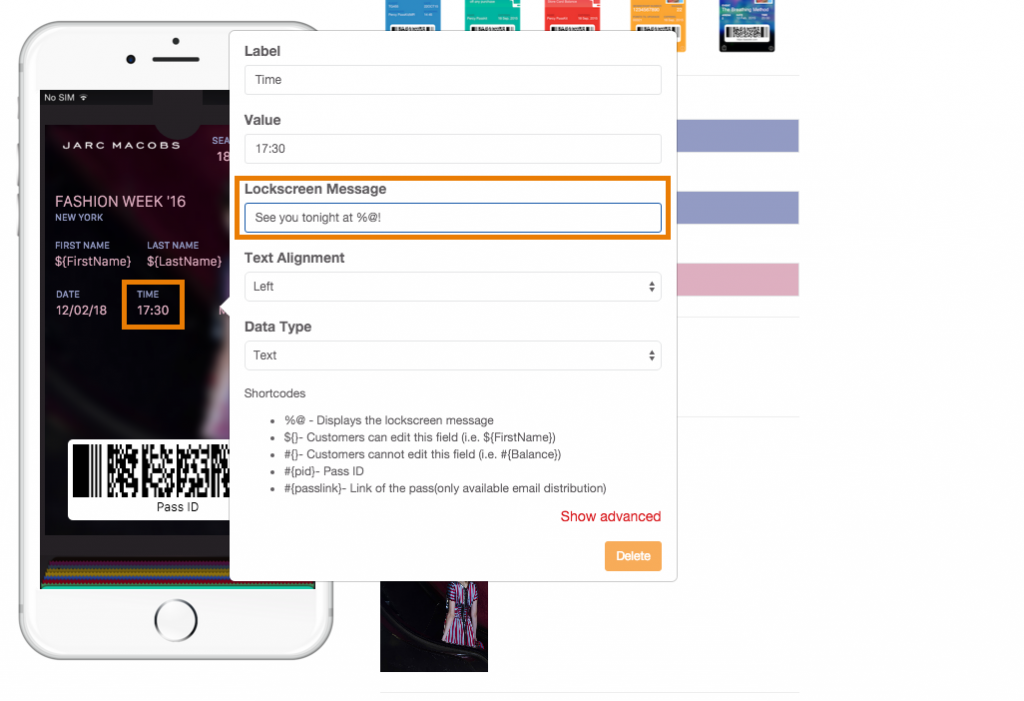
Time Update
Similar to above, you can add text to give more context to the user. In this case, if we change the time of an event, users will be notified with the updated message on their lock screen.
Key Points
Keep in mind the following when creating your campaigns and sending push updates to your customers:
- You can only send a push update once every 10 minutes
- The shortcode ‘%@’ simply takes the newly updated value and displays it in the lockscreen.
- Use ‘%@’ anywhere you want a lockscreen message to show a change the ‘Value’ message of that field.
- Use ‘%@’ with some text to give it context (i.e. Today’s special: %@).
If you’re already using CherryPie and want access to the full user guide, download that here.
If you have any comments or questions let me know in the comments below!
