Important Note: CherryPie is no longer supported.
PassKit released the all new PassKit Platform in early 2020. This platform incorporates decades of experience designing, developing and implementing world class mobile wallet solutions for some of the biggest international brands. And at the same time, working with small businesses all over the world to help them access the cool capabilities of Apple Wallet and Google Pay passes. We have combined these rich learnings, proven best practices and ever growing knowledge, to deliver you the very best mobile wallet management platform. A platform where you can extend your mobile reach by quickly integrating Apple Wallet and Google Pay Passes into your business. Into your processes. Into your systems. And most importantly into your customer experience.
PassKit now delivers dedicated modules to solve your specific business use cases. No longer do you need to waste time learning about ‘passes’ language. No longer do you need to study mobile wallet terminology. You now work with Mobile Wallet API’s designed around your business processes; your language. A language you are already familiar with. The latest platform currently covers:
TRY THE NEW PASSKIT PLATFORM FOR FREE – UNLIMITED TEST PASSES
————————–
CherryPie is a simple yet powerful mobile marketing automation platform, meticulously designed and crafted for marketers and agencies. CherryPie enables businesses to propel customer engagement, drive physical world transactions/revenue, and stimulate sustainable loyalty by leveraging native mobile wallet applications and beacon technology.
CherryPie is now upon us, meaning that marketers now have access to an entirely new form of mobile marketing automation. Each week, I’ll walk you through a tutorial on how to get the most out of your experience with CherryPie. This week, I’ll cover adding assets within CherryPie.
How to Add Assets in CherryPie
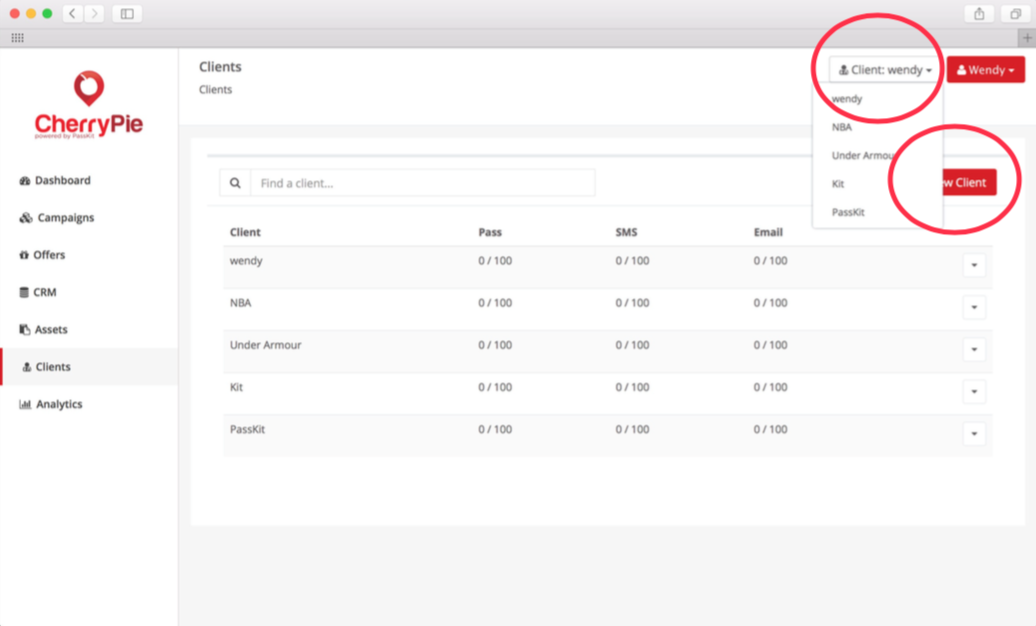
Pre-step. Add Client
1. Add Images
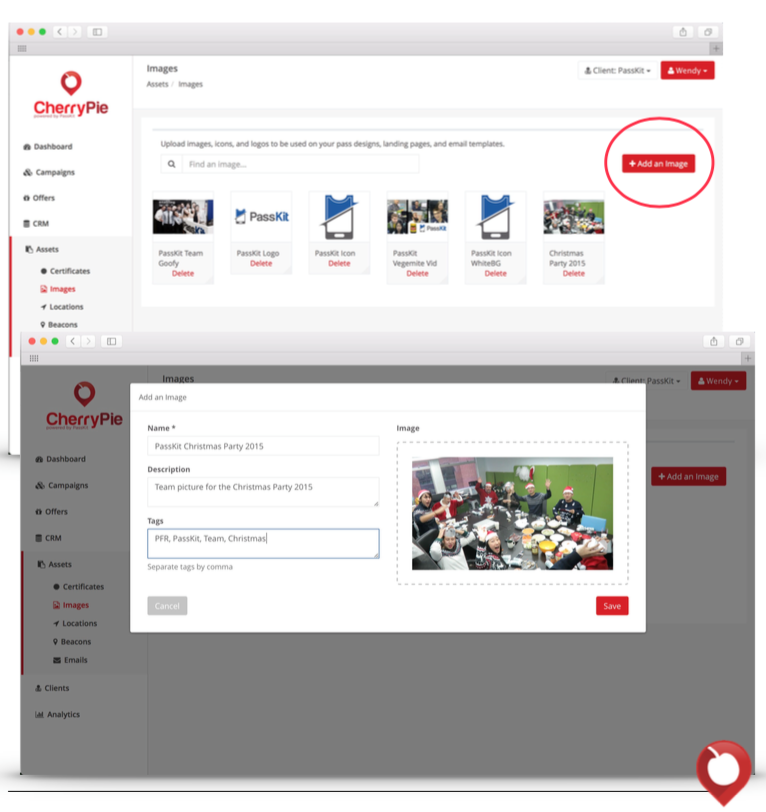
This is where you’ll store all your image assets, which can be used in the pass, email template, and landing page. Don’t worry about cropping it to be the right size – we have cropping tools in the ‘design’ section of creating your pass and adding it to the landing page.
Go to Assets —> Images —> Add an Image
Enter a name for that image and add a description or tag (for search purposes), then select your image or drag and drop it in the box.
2. Add Locations
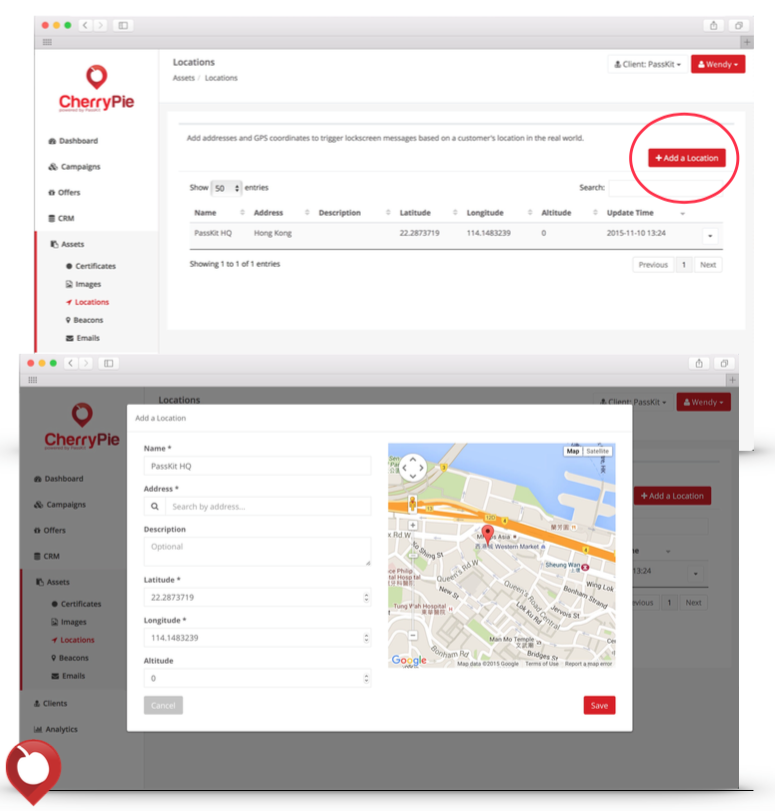
Go to Assets —> Locations —> Add a Location
Enter a name for that location and type in the address to search for it on the map. Click and hold to position the map marker in the exact location you want it and the latitude and longitude will automatically be generated.
To enable GPS lock screen message to appear only above a certain height (i.e. on the 60th floor of a building), add in the altitude in meters.
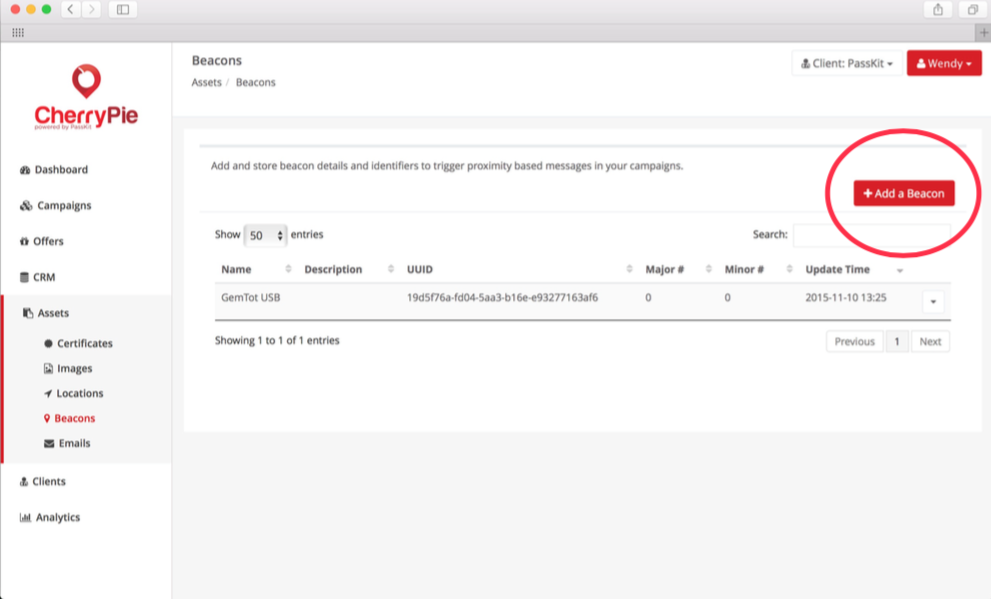
3. Add Beacons
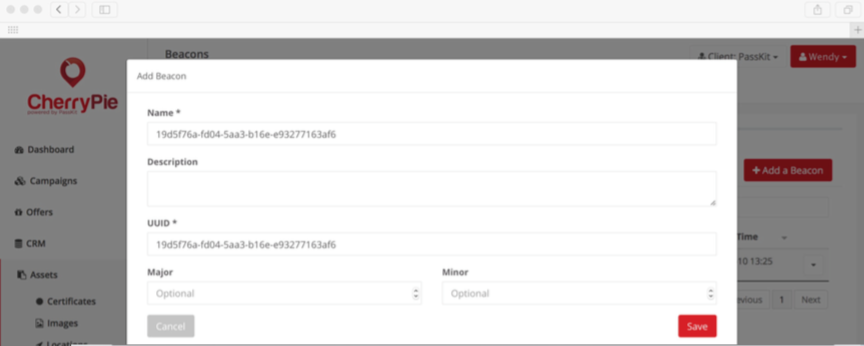
Go to Assets —> Beacons —> Add a Beacon
Option 1:
Enter in a name (i.e. GemTot USB) and a UUID is automatically generated for you. This is the default UUID for GemTot Beacons.
Option 2:
If you already have a UUID, enter your UUID in the ‘Name’ field. If your UUID is valid, it will be the same in the UUID field. Ensure that you’ve added hyphens in the right place of the UUID like this: 19d5f76a-fd04-5aa3-b16e- e93277163af6.
4. Add Assets
Go to Assets —> Emails —> Add an Email
Here are some shortcodes you can use in your email:
- #{passlink} – the URL of the pass
- ${FirstName} – Field that can be edited by customers
- #{Balance} – Field that cannot be edited by customers
- #{pid} – the Pass ID
Why are assets important in CherryPie?
Assets are extremely important in marketing automation. CherryPie allows marketers to manage each clients assets, all in one place. You can search and filter through images so that every image can be easily accessed. You can also easily manage and store locations and beacons, allowing you to view all your clients beacons in one place. The powerful part about CherryPie is that each clients assets are easily accessible in one place. Making assets so easily manageable is very important for marketers. Making your marketing automation more powerful than ever.
Now you know how to add assets to a client within CherryPie.
If you’re already using CherryPie and want access to the full user guide, download that here.
If you have any comments or questions let me know in the comments below!


