In this article we are going to explain how to distribute mobile wallet content to contacts via email. We will assume you already know How to Upload your contacts to the CherryPie CRM, and How to create Customer Segmentations within CherryPie. If you don’t, please check out those articles first.
NOTE: This process will be effective only if you already uploaded all you contacts’ info. Please refer to How To Create Digital Membership Cards For Mobile Wallet (Full Guide) for extra info about distribution.
Exporting CSV file with unique Pass URLs from CherryPie
Step 1) Login to CherryPie.
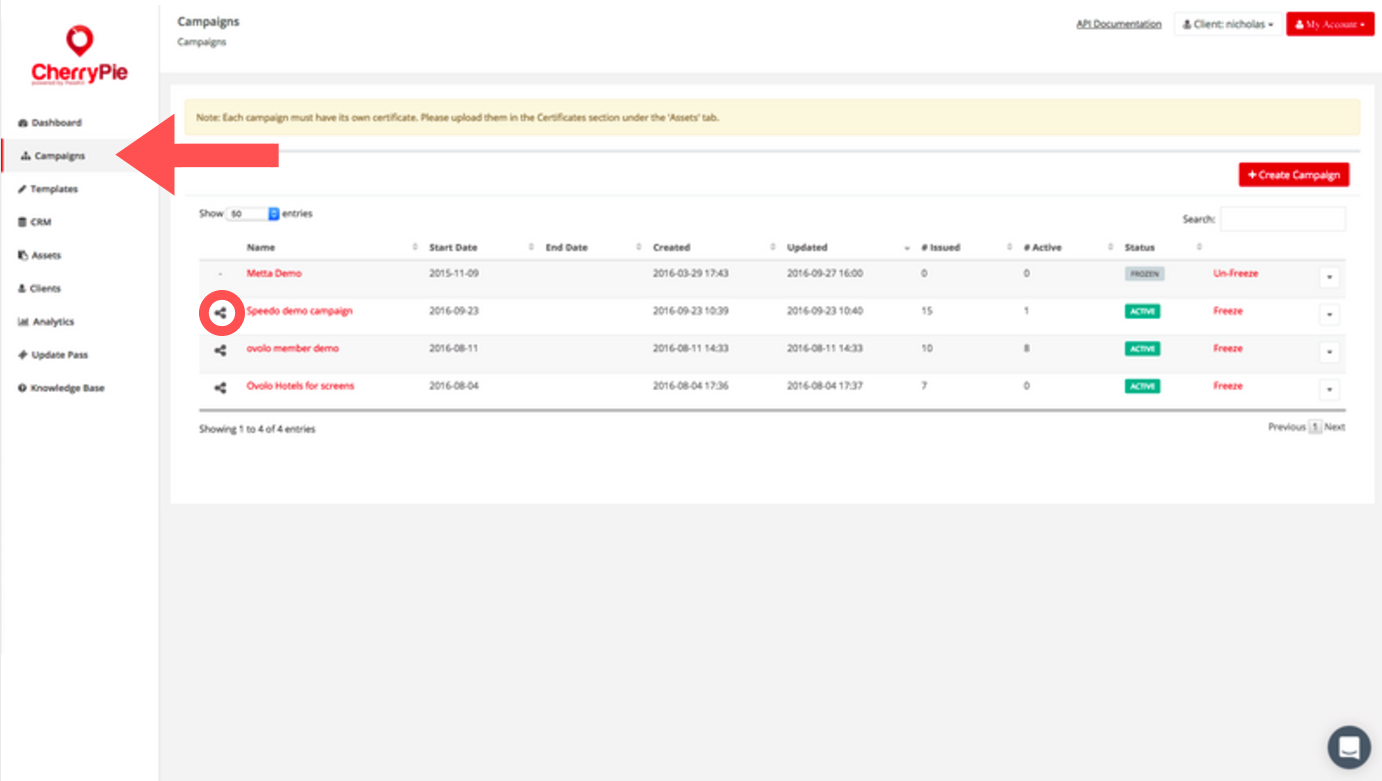
Step 2) Click on Campaigns on the left hand side
Step 3) Click on the ‘share’ icon next to the name of the campaign as shown on the image above.
Step 4) Tick the ‘get list of unique pass URLs’ box. Then insert the email address where you want the CSV to be sent to in the ‘CSV will be sent to this email’ section. There is no need to consider contact list(s) at this stage, as the actual email campaign will be sent through another platform (see below).
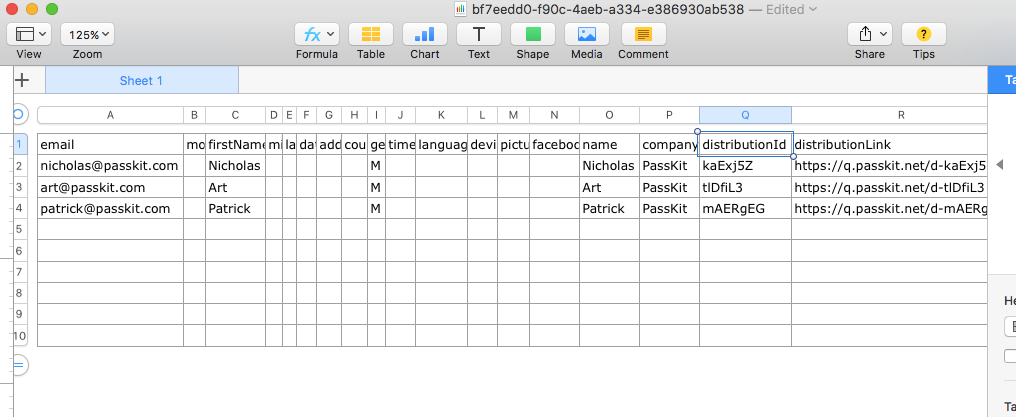
Step 5) Click on ‘distribute’ on the bottom right of the screen and check your email inbox. You should receive a CSV file with unique pass URLs. This file is what you need to send out your campaign. If you don’t receive any email, make sure you also check your spam folder. Here below, an example of how the CSV file will look like. Information shown depend on data collected from the customers. Unique ID is located under the distribution link column.
Sending Mobile Wallet content to CherryPie contacts
In order to send out Mobile Wallet content via email, we recommend using MailChimp. The service is free and easy to use. Before sending an email campaign, you need to upload your CherryPie CSV onto a new list in MailChimp. In order to do that, follow the instructions below:
- login on MailChimp > click on lists > Create list > Fill required info > click save > import CSV > select file exported from CherryPie > Select columns and data you want to keep > click next > Customer List is now created.
It’s now time to create the actual campaign! MailChimp already has a detailed guide on how to Create an email campaign with campaign builder here, however we will go through the process here as well with our CherryPie example.
NOTE: To send the specific Pass URL to the unique customer, you can create a custom field with merged tags within MailChimp and then embed it in your campaign.
The email campaign creation process in MailChimp
Step 1) Login to MailChimp.
Step 2) Click on Create campaign and choose the type of campaign you want to launch (see picture below)
Step 3) On the Recipients step, choose a list from the drop-down menu.

Step 5) Follow instruction in MailChimp and fill in details (i.e. campaign name, sent from, etc)
Step 6) Choose an email template and edit the email content as needed for your campaign.
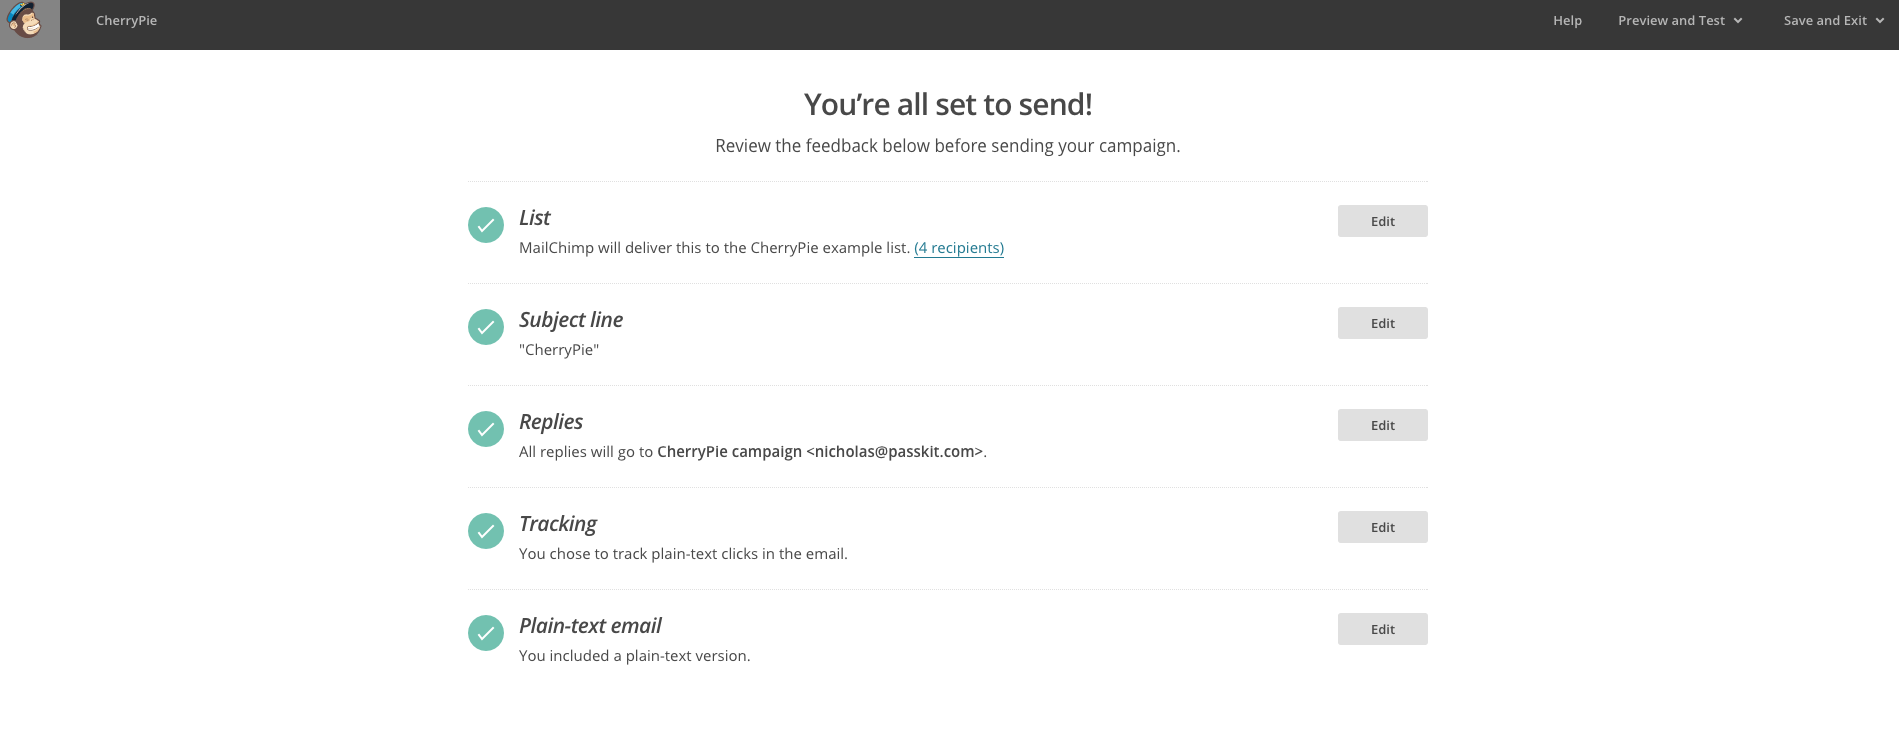
Step 7) Once you are setup with the template, you should get to a summary screen that looks like the one below here.
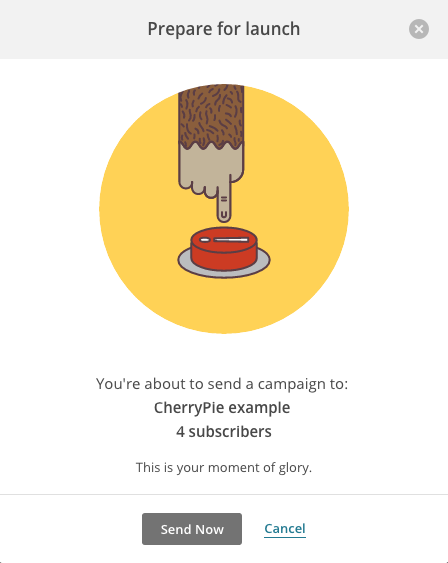
Step 8) Right before sending, MailChimp will display the following screen displaying your campaign name and the number of subscribers you are sending it to.
After this step, and as soon as customers start opening your email, you will be able to monitor CTR, open rates and all stats related to your campaign. This is the end of the article and our guide on how to distribute Mobile Wallet content via email. You might be also interested in our previous article How to distribute Mobile Wallet content online and offline.
If you want to kick-start your mobile wallet campaign you should check out CherryPie here. Lastly, please feel free to leave any feedback or question in the comment section below should you have any. We will try to reply as soon as we can.


